E11 | Ridgewood Colonial Revival | Colonial Revival Revived
Season 46 Episode 11 | 23m 42sVideo has Closed Captions
Richard comes up with a brilliant solution to a major plumbing issue in the house.
Kevin O'Connor joins architectural historian Maggie O'Neill to explore colonial revivals. Later, he and Zack Dettmore work on framing the upstairs addition. In the attic, Richard Trethewey explains that one mini-duct high velocity system is enough. In the basement, he and Lev Minsky install tubing on the main trunk line. Zack installs special hardware in the kitchen to prevent wall wracking.
Problems playing video? | Closed Captioning Feedback
Problems playing video? | Closed Captioning Feedback
Funding for THIS OLD HOUSE is provided by The Home Depot and Renewal By Andersen.
Support provided by:

E11 | Ridgewood Colonial Revival | Colonial Revival Revived
Season 46 Episode 11 | 23m 42sVideo has Closed Captions
Kevin O'Connor joins architectural historian Maggie O'Neill to explore colonial revivals. Later, he and Zack Dettmore work on framing the upstairs addition. In the attic, Richard Trethewey explains that one mini-duct high velocity system is enough. In the basement, he and Lev Minsky install tubing on the main trunk line. Zack installs special hardware in the kitchen to prevent wall wracking.
Problems playing video? | Closed Captioning Feedback
How to Watch This Old House
This Old House is available to stream on pbs.org and the free PBS App, available on iPhone, Apple TV, Android TV, Android smartphones, Amazon Fire TV, Amazon Fire Tablet, Roku, Samsung Smart TV, and Vizio.
Keep Exploring


This Old House Insider Newsletter
Get This Old House exclusive stories, tips, and behind-the-scenes information delivered right to your inbox every month.Providing Support for PBS.org
Learn Moreabout PBS online sponsorshipKevin: Today on "This Old House"...
The Colonial Revival.
Tell me about it.
Maggie: Colonial Revival was one of the most popular architectural styles of the early 20th century.
Kevin: You got the beast up here, Zack.
What's this for?
Zack: We're just going to use this beam saw to cut all our studs at once.
♪♪ Ah.
That's it.
♪♪ ♪♪ ♪♪ Kevin: Hey there.
I'm Kevin O'Connor.
And welcome back to "This old House" and to our project here in Ridgewood, New Jersey, one of the state's northern suburbs and about 30 minutes from Manhattan.
We're working for a young couple, Peter and Kay, who have asked us to do a couple things to their existing house.
They want to reconfigure the existing space while upgrading the mechanical systems and also add a small addition off of the back.
The home was built in 1930, and it's considered a Colonial Revival, a style that we wanted to learn more about, so I've decided to meet up with an architectural historian.
♪♪ Hey, Maggie.
Nice to meet.
Maggie: Hey.
Nice to meet you, too, Kevin.
Kevin: So, Colonial Revival.
Tell me about it.
Maggie: Colonial Revival is one of the most common architectural types in the United States.
It's something that we see in almost every single neighborhood in America.
Kevin: Why so popular?
Maggie: A couple of different reasons.
The first is that it can be applied to any type of buildings, so government buildings, school buildings, but it was most commonly done in homes.
Kevin: What's Colonial Revival about this one?
Because I actually wouldn't have pegged this as Colonial Revival myself.
Maggie: Yeah, this is an earlier type of Colonial Revival.
This is probably built around 1900, but what makes this a Colonial Revival is the overall symmetry of the building.
So you have this front entryway lining straight up with the windows and the dormer, and then you have those paired windows on the side, which are also symmetrical.
Kevin: Hm.
Maggie: The two things that make this an early Colonial Revival are the shape of the roof -- so you have a hipped roof here -- and also the full-width porch right across the front.
Kevin: That's what threw me off, because I don't think of a big, broad porch like that with Colonial Revival.
And that's not a symmetrical porch.
Maggie: No, it's not.
The porch is really a carryover from Queen Anne, which was the most popular architectural style right before Colonial Revival.
Kevin: Alright.
Maggie: What makes this porch Colonial Revival are the columns.
Those columns are very classical in nature.
It's really a revival of those early architectural types, where Queen Anne was a little bit more spindly and more based in woodwork.
Kevin: Alright, well, notes taken on house one.
We got more?
Maggie: Yeah.
Let's go.
♪♪ Kevin, as we go through some of these houses here, I think it's important to remember that when we talk about Colonial Revival, we're talking about the colonial period, and the two architectural styles that we're reviving here are Federal and Georgian.
Those are the parent styles for Colonial Revival.
Kevin: So a well-done Colonial Revival will pull those two styles into it.
Maggie: Especially in the later periods when being accurate to those two styles were one of the most important things.
Kevin: Okay.
Maggie: And that leads us to this example here.
This example is from about 1920.
And this one really carries through some of those Federal architectural details.
Specifically, that eyebrow window is a direct pull from Federal architecture, but we also see some new elements that are incorporated into most Colonial Revivals.
So we still have that center symmetry.
We still have that pulled-off portico.
But if you remember, we had those classical-shaped columns on the other building that we see again here.
But this time period introduces something that's very common on later Colonial Revivals, and that's that side addition.
People wanted a little bit more space, so they started adding these side additions.
It's the only thing that might be asymmetrical about a Colonial Revival of this period.
Kevin: But it's small.
It doesn't jump out at you.
And what about the brick?
Maggie: The brick is another common material upgrade in this period.
It was something that was used historically in Federal and Georgian, but there was another key that made brick very popular at this time, and it was the fact that the manufacturing of brick changed and it became a lot cheaper to make, and it became a lot more readily available.
Because they were able to do brick veneers.
So the smaller, thinner brick that was a lot cheaper to make and a lot cheaper to install.
Kevin: So if you had given me a test, I think I would have passed with this one and said it was a Colonial Revival, although some of that Federalism in there would have maybe thrown me for a little bit of a loop.
Maggie: This is one of the most common examples that you'll see of Colonial Revival, but we have a couple more to look at if you want to take a walk.
Kevin: I do.
Maggie: Alright, Kevin, this one was built about 1930.
Here's your chance, smarty pants.
You get to tell me all the architectural features you see that you think are part of Colonial Revival.
Kevin: Okay, so the center portico and entrance.
Maggie: Mm-hmm.
Kevin: Right?
You've got the rounded columns.
The shutters on the upper windows, for sure.
The little bump-out over there that doesn't overwhelm.
And then I got to tell you, after that, I'm struggling with three windows and not two.
And the roof line?
I mean, a gambrel?
Maggie: Yeah.
It is.
So, starting with the windows at the bottom, those are triple-paired windows.
And even though we've only seen single windows and double-paired windows, triple-paired windows are just as common as the other two types.
Kevin: You left that off the study guide.
Maggie: I did, but even though they're in sets of three, they are still symmetrical when you look at the overall building.
Kevin: But what about the roof?
Maggie: The gambrel roof is something that you see very commonly in New Jersey.
However, only about 10% of Colonial Revivals have the gambrel roof.
Kevin: Alright.
Well, I want a re-test.
Maggie: Okay.
Kevin: On to four?
Maggie: Sounds good.
Alright, Kevin, you ready for your test?
Kevin: I am, but if I may, I'm gonna skip all the specifics and just do a write-in and say that this one looks the most like our project house.
Maggie: You're right.
This one definitely looks the most like the project house.
There's one feature, though, that's a little bit different, and that's that projecting dormer up on the third floor.
Kevin: Which we don't have on our house.
Maggie: You guys don't have on yours, but this is one of those features that shows the ways that Colonial Revival architecture was easily adaptable for people's needs.
Changes like that are the reason why Colonial Revivals are still built today although changed for modern updates and things like that.
Kevin: Well, I like to hear about the adaptability and the flexibility because we're gonna make some changes to our house.
Not a lot out front, but some.
And I'm hoping that when we're done it still fits within the Colonial Revival style.
Maggie: You can make so many changes to Colonials, but as long as you have some of these features that we've talked about repeatedly, there's no problem in calling it a Colonial Revival.
Kevin: Maggie, it was a master class.
Thank you.
Maggie: I appreciate it, Kevin.
Thank you.
Kevin: Yeah.
It's a beautiful neighborhood.
Maggie: It's so nice here.
It's great living in New Jersey.
♪♪ [ Drill whirring ] ♪♪ ♪♪ Kevin: The new additions in the back of the house on the first floor has our new kitchen, and the rough layout is a little pantry area here, refrigerator.
Then there's a line of cabinets with a range on this wall, sink underneath this window, and then a bench, and then room for a table right here.
And you start to get the modern flair they're adding.
So there's going to be glass basically coming to a corner here.
And, in addition, a modern set of cabinets.
So not a lot of trim.
Very sleek lines.
And as a result, Zack has gone with the LVL studs right here because they are super straight and it's going to be very forgiving when he hangs those modern cabinets right there.
And you can sort of get a sense of how we're going to frame the upstairs, as well -- -[ Thud ] -Zack, is that you up there?!
Zack: Yeah!
You want to come up here, give me a hand?!
Kevin: I do!
I'll be right up!
Well, there you go.
We're going upstairs.
Making a racket up here, Zack.
Zack: Yeah, sorry about that.
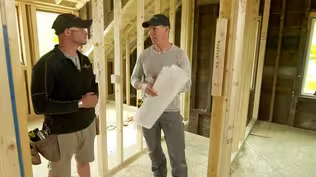
Kevin: So, second story of the addition.
Is this all primary?
Zack: No.
So, what's going to happen here is this bathroom, the original bathroom, gets extended out a little bit.
The bathtub's running this way.
There's a door.
I believe the bed will be here.
Now we're in the bedroom.
Two big windows downstairs like you saw in the kitchen.
And that'll be a little closet in this corner.
And then a little hallway here that takes you into this hallway.
Kevin: Okay.
Great.
Uh, so what are we doing?
Framing walls?
Zack: Yes.
We already got our plates cut.
So now we have to cut all these studs.
Got to get some tools, and we'll be ready to go.
Kevin: Alright.
You got some guys down there?
Zack: I do.
My coworkers are down here.
You guys ready to throw those tools up to me?
Kevin: You got the beast up here, Zack.
What's this for?
Zack: Oh, we're just going to use this beam saw to cut all our studs at once.
It'll just make it more consistent.
We'll have less cumulative error.
And it'll be pretty efficient, too.
Kevin: So, what are your cuts?
Zack: Uh, basically, we're going to make -- Our first cut will be squaring off the bottom, and then we'll pull the tape measure from there to the top, and we're going to cut them 87 and 1/4", which is our right height to tie in with this existing eave.
Kevin: Clever.
Okay.
I got "up" arrows at the bottom of each one of these.
You crown these?
Zack: We crown them.
So, basically the wood has a bit of a curve in it.
And with a wall stud, we say we want it pointing out.
Now all we're gonna do is we're gonna take these clamps, clamp these, uh, stacks of wood together so they don't move, and then we can go ahead and start making our cuts.
♪♪ Alright.
So, square off that end.
♪♪ Alright.
If you want to plug that saw in, I'll screw this guy down.
♪♪ ♪♪ ♪♪ Kevin: That's efficient.
♪♪ Zack: Alright.
So now we'll pull off the end -- 87 and 1/4" is our dimension for these studs.
So you can mark on your side.
♪♪ We're gonna use this block, which is the offset of our saw base, and we will just put it right there, and then we can take our guide... and put it right there.
I can screw mine down on the block.
And then you can use the block on your side once I've got this...fast.
♪♪ And before you make the cut, just see where the kerf lines up to make sure we're good with that block.
♪♪ ♪♪ ♪♪ Kevin: Alright.
That was satisfying.
Zack: Yeah.
You can take that off.
I'm just going to mark this out.
Kevin: Mark it out for what?
Zack: We're actually going to make a mark for our insulation batts.
So let me show you.
This is the insulation we're going to use.
This is a wood product.
And basically that batt is going to end here, and we'll have another one above.
So if we cut our holes for the electrician to run his wires now, it'll be easier for the insulation contractor to just butt the two together in that cavity between the two, instead of having to notch out wherever the wires are coming through.
So we can cut these three at a time.
Alright, Kevin, I know you're capable, but I got my coworkers here.
So, uh, Justin, if you want to work with Charlie nailing off the top.
Mike, just start staging these out.
And, Kevin, you're with me.
Line them up with the marks on the top plate, and I'll nail them off.
♪♪ ♪♪ Alright, Justin, you brace that side.
Charlie, you brace that side.
We'll all spread out evenly.
Lift on the count of three.
Ready?
One, two, three!
♪♪ Alright!
Alright.
I'm going to nail this off.
♪♪ Alright.
Let's get that level.
♪♪ Kevin: So, Zack, as I'm looking at this wall right here... No window openings?
You putting those in later?
Zack: No, actually the headboard of the bed is here, so there's no windows.
They're gonna take in the view from these two large windows here.
So that's the answer.
Kevin: And no sheathing before we lifted it.
Zack: Yeah.
Sometimes when you're dealing with additions, that old house can be a little out of plumb, so we find it doesn't really pay to necessarily sheathe the whole wall when you're tying into an addition, so we're just going to sheathe this after.
Kevin: Next wall there?
Zack: Next wall here.
Let's get started.
Kevin: Well, listen.
The gang cut definitely works.
You got the productivity there.
Your electrician's going to be really happy about those holes drilled, so... And good crew.
Zack: They're good, right?
Kevin: Alright.
Let's get this guy up.
♪♪ ♪♪ Richard: We're up in the attic here in New Jersey.
The very hot attic.
Now, it's our challenge now to get heating and air-conditioning into this building.
Now, this building originally had a steam system.
It never dreamt about having air-conditioning.
Now, how do we fight the ductwork into this old and very small building?
So, here in the attic, we're gonna insulate this at some point and make it come inside the building.
The perfect location for any air handler is right here, and you put it in, and if you run it with conventional ductwork, you run it, and you do a big duct, and it gets to smaller into smaller into smaller.
And for the entire top floor, you have supply reg's in the ceiling.
We also have to return ducts coming back to this unit.
So, for that reason, most HVAC contractors will say, "I'll do one system in the attic to down-feed the top floor."
And because he can't get down through the building with his ductwork, we'll do another system in the basement to up-feed the first floor.
So that ends up with two engines, two blowers, two condensers -- two systems, so to speak -- when it's not really that big a house.
It's 2,700 square feet.
So what we looked at here -- We could have done many splits.
We could have done a lot of things.
But what we looked at was to use a mini duct system.
A mini duct system has one size supply trunk.
It comes off the blower, and the blower gives it at a higher pressure.
So now we can go through one size supply trunk to go all through the building.
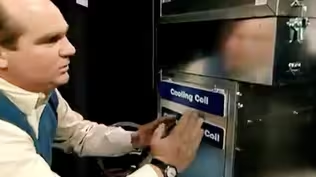
Now, if you're going to have higher pressure, you got to make sure it's quiet, and so, for that, the key to the system are these attenuators.
These are spun nylon on the inside.
And it absorbs any sound.
So the main trunk is always one size.
We stab into that trunk, cut a hole in, and at the room side, this is what it looks like -- an outlet like this.
And this is in any number of finishes.
And these outlets can be in the floor, they can be in the ceiling, or they can be in the high sidewall.
They just can't blow on people.
And that's pretty straightforward.
So now with this system, this air handler sits right here.
Return comes into the back.
And then the air comes out, and it goes out to two motorized zone dampers.
There's one damper right here.
Now, that'll feed everything on the top floor to feed the upper level of the building.
And the other damper is right here.
And that means all we had to do really to unlock the system was find one place where we could get 9-inch trunk down through the building.
And the place we actually found to run the trunk was in this new second-floor bathroom, and they are well under way here.
Great work.
I love it.
Twin lavatories right here.
They've got their copper trim going to their PEX tubing.
And they're even gonna protect the lines right here.
So, the place we actually found for the trunk was right here.
Behind the bathtub right here.
Below it is a closet in the first-floor kitchen.
And that got us all the way to the basement.
If we had gone conventional, that supply trunk might be here.
Return would be as big.
We didn't have room for that.
So, down here in the basement, the trunk has presented itself right here.
And it's gonna run along here.
Now, this is the logical place down here in the basement.
If we had gone that conventional way, a separate air handler upstairs and another one downstairs, it might have been right here.
And if we did, we would have supply trunks coming up here and feeding all the different places and would have returns coming back.
So we would lose a lot of this headroom.
So now we're not gonna lose any headroom.
We're gonna make all this electrical go away, as well.
So we ran the trunk right here.
And now we -- It's in the good hands of Lev Minsky and his gang.
So you've changed the size of it.
Yep, we are reducing it from 9" to a 7-inch to match the height of the beam here and to save all the headroom.
Richard: Alright.
So, 7-inch is going to bring it right to about here.
So that's going to be perfect.
Lev: Yeah.
It can be boxed in, and it will disappear.
Richard: Okay.
So you got some takeoffs in, I see.
Lev: Absolutely.
We're ready to apply the last one.
♪♪ ♪♪ ♪♪ ♪♪ Richard: Alright.
Good.
So take the slug out of there.
Perfect.
Alright.
We ready to go up with this thing?
Lev: Absolutely.
Richard: Alright.
I can -- I can be a holder.
Lev: So we're using two different size attenuators here.
Originally we had planned both 2-inch attenuators, but we had a difficulty getting into Peter's office.
We had discovered that room was built on concrete slab.
Richard: Sure.
Lev: So we had to chase this up in a wall to a slotted wall diffuser.
Richard: Great solution.
You never get stumped.
I love it.
Lev: So there it is, Richard.
Nice and tight.
Richard: That's unbelievable.
So, with this 7-inch round, we're able to completely hide the supply.
We don't need an individual return from every room.
Lev: That's right.
Richard: And they've gained, what, two absolutely fabulous usable spaces.
Lev: Absolutely.
Richard: Thanks, guys.
Great job.
♪♪ Zack: Alright, Mike, so, here in the kitchen, we're almost done framing, but we got to add some of this hardware, right?
And there's a couple things I want you to understand about the structure of this building so when you're working and putting this hardware in alone, you sort of understand the why behind it.
Mike: Gotcha.
Zack: Alright.
So, uh, I want to tell you about lateral forces.
There's basically three that we want to talk about.
And these forces are caused by, like, wind or earthquake.
But they're basically, uh, a sideways force on the side of the building, right?
The first one is racking.
So you can see the wall's moving like this.
And how do you think we would prevent that from happening?
Mike: I'm sure sheathing would help with that.
Zack: Exactly.
So I made another little wall.
I put paper on the outside, cut a little window in it, and you can see that this one doesn't want to rack as much because that paper is stabilizing the whole wall.
But, however, when we cut a large hole in the wall like we have behind us, there isn't as much sheathing area.
It still wants to rack a good bit.
So we actually have to add plywood on the inside of this part of the wall to make this not rack as much.
So that's sort of a complexity with modern architecture.
Mike: Hm.
Zack: The next force is called base shear.
So that's basically if you were to push the whole house this way -- that's base shear.
And how do you think we stop that from happening?
Mike: I thought that's what these anchor bolts were for.
Zack: Exactly.
So they're coming up through the foundation.
They're tying down this bottom plate.
And that's going to keep this whole thing from sliding.
So we have that solved.
The next one is overturn.
When there's a force on this side, it actually wants to lift and overturn this way.
How do we solve for that?
Mike: Wait.
I thought those were what the anchor bolts were doing.
Zack: It's a good point.
So, the anchor bolts definitely help, but in this case, the engineers specified using this piece of hardware.
And this is called a hold-down.
So basically it's doing exactly what it sounds like.
It's holding down this wall from overturning.
And what separates it from the anchor bolts is this actually gets attached to the floor joist and then it gets anchored into the foundation.
So this isn't always necessary, but it is necessary in this application because we have these massive openings.
So why don't we go ahead and put these in?
Mike: Sounds good.
Let's do it.
Zack: Let's do it.
Alright, Mike, so, the first place I want you to start is basically taking this hold-down, putting it over the anchor bolts that are already installed just like that.
And then basically the hold-down is going to look like this.
We've got this little half-moon washer.
That's going to go right in here.
And then we're going to put the bolt through there, tighten it down.
Alright.
You want to give it a shot?
Mike: Yep.
Let's do it.
Zack: Alright.
Beautiful.
♪♪ ♪♪ ♪♪ Richard: Hey, guys.
Zack: How's it going?
Richard: Hey, Mike.
How are you?
Mike: Nice to see you.
Richard: Looks like you're doing all the work here.
Mike: Seems like it.
Richard: Welcome to the industry.
Hey, big progress here, huh?
Zack: Ah, thank you very much.
Richard: It's unbelievable.
So, what do we got for next week?
Zack: Next week, I think we'll pretty much be done with mechanicals and roughing, and we'll be doing some insulation and heading towards drywall.
Richard: Good.
So, until next time... Zack: I'm Zack Dettmore.
Mike: I'm Mike Dul.
Richard: And I'm Rich Trethewey for "This Old House."
I'm hoping the A/C will be on.
Zack: That'd be nice.
Richard: If I have anything to say about it.
Kevin: Next time on "This Old House"... we're gonna learn about a magic membrane that helps us protect the interior of our wall.
Jenn: And I'm visiting the James Rose Center right here in Ridgewood to get inspiration for our project.
Man: We built a roof garden.
Would you like to see it?
Jenn: I would love to see it.
Zack: And we're gonna pre-fabricate a set of stairs, start to finish, right here at the job site.
Kevin: So, nose forward, pockets underneath, right?
Zack: Correct!
Kevin: That's next time.


Support for PBS provided by:
Funding for THIS OLD HOUSE is provided by The Home Depot and Renewal By Andersen.